How to Replant Mint: Essential Steps and Common Issues Explained
Hello to all the plant lovers out there! I’m excited to share some guidance on how to transplant mint. After a journey filled with challenges and trials, my hands are ingrained with soil, but I am thrilled to be sharing my knowledge with you now.
Ready to dive in? We’ll cover selecting cuttings, choosing the right pot and soil, mastering replanting techniques, and caring for your mint post-transplant. Trust me, it’s easier than you think, and I’m here every step of the way!
Key Takeaways
- Choosing the right mint cuttings to propagate is essential for successful replanting.
- Proper methods for taking cuttings from a mature mint plant should be followed to ensure healthy growth.
- Preparing and nurturing mint cuttings before replanting is important for their establishment.
- Selecting the perfect pot and soil for growing mint is crucial for its growth and development.
Choose the Right Mint Cuttings to Propagate

Let’s talk about choosing the right mint scions or cuttings for propagation. It’s crucial to identify healthy mint stems and understand the proper method for taking cuttings from a mature mint green.
Then, we’ll cover how to prepare and nurture these cuttings for replanting, including water rooting.
Identify healthy mint stems suitable for propagation
Before we delve into replanting, I must explain how to identify healthy mint stems suitable for propagation. To propagate mint, you don’t need a green thumb but an eye for healthy mint stalks.
Here’s a quick guide:
- Vigorous Growth: Choose mint stalks that are showing vigorous growth and don’t have any signs of disease or pest infestation.
- Leafy Stems: Healthy mint stalks are generally leafy and dense, not sparse.
- Firm Stems: Mint stems suitable for propagation should be firm, not limp or woody.
The proper method for taking cuttings from a mature mint plant
I’ll now guide you through the correct method of taking cuttings from a mature mint plant, a crucial step in successful propagation. First, ensure that your mint plant is mature and healthy. Choose a stem about 6 inches long, with plenty of leaves and a robust root system.
Here’s a handy table to remember the process:
| Steps | Description |
| Step 1 | Choose a 6-inch stem |
| Step 2 | Ensure it has plenty of leaves |
| Step 3 | Check for a robust root system |
With these cuttings, you can grow mint from cuttings and start your new mint plant. This efficient method allows you to produce many plants from a single mature mint plant. Keep practicing, and you’ll master this technique.
Preparing and nurturing mint cuttings for replanting (e.g., water rooting)
Once you’ve selected the right mint scions or cuttings, it’s crucial to prepare and nurture them properly for successful replanting, especially if you’re using the water rooting method.
Here’s a simple guide on how to grow mint plants from cuttings:
- Strip the lower leaves of your cutting, leaving only a few at the top. This is where roots will grow.
- Place the mint scions in water, ensuring the nodes are submerged. Change the water regularly to prevent rot and mold.
- Once you observe root growth, water the mint sparingly until you can replant. Overwatering can lead to root rot.
Select the Perfect Pot and Soil for Growing Mint

Now, let’s select the perfect pot for your mint. The type of pot you use significantly affects the growth of your mint, especially in terms of proper drainage. Choosing the right soil is also crucial as it nurtures the mint’s root system.
Why the type of pot matters for mint growing
Despite its reputation for being easy to grow, mint thrives best in the right type of pot and soil. The type of pot you choose when growing mint in pots can profoundly affect the success of your mint growing.
Here are three reasons why the pot type matters:
- Drainage: Mint prefers well-drained soil. A pot with good drainage prevents waterlogging, which can lead to root rot.
- Size: Depending on the type of mint you’re growing, you might need a larger pot. Mint spreads quickly and needs room to grow.
- Material: I’ve found that clay pots are excellent for mint due to their porous nature, helping prevent overwatering.
Importance of proper drainage in mint cultivation
Selecting the right pot for your mint plant is crucial, and understanding the importance of proper drainage in mint cultivation can make a world of difference in your gardening success.
When you’re ready to regrow mint, choosing a pot with adequate drainage can prevent water from pooling at the bottom, leading to root rot, a common issue for this herb.
Any standard potting soil should work fine for mint cultivation. Still, I prefer a well-draining one to ensure the roots don’t become waterlogged.
Remember, too, that the size of the pot matters. A pot that’s too small won’t allow for proper root spread, while a pot that’s too large can keep soil too damp.
Lastly, never overlook the importance of correct drainage. It’s essential for a thriving mint plant.
Choosing the right potting soil to nurture the mint’s root system
I’ve found that picking the right potting soil is as important as the pot itself for nurturing a healthy mint root system, and it’s a decision that shouldn’t be taken lightly.
Here’s a three-step guide to choosing the right potting soil to nurture mint’s root system:
- Type of Soil: Mint will grow best in well-draining, slightly acidic to neutral soil. Avoid heavy, clay-like soils that can suffocate the plant stem.
- Pot Size: A small pot can restrict growth, so ensure the pot allows enough space for the soil surrounding the plant and root expansion.
- Nutrient Content: The soil should have sufficient organic matter to provide the nutrients mint plants need to thrive.
These factors will ensure your mint flourishes.
Master the Technique of How to Replant Mint

Now, let’s get into the nitty-gritty of transplanting mint. We’ll discuss the ideal timing and method for removing the mint from its initial location. Then, I’ll share some tips on positioning your mint in its new home.
When and how to remove the mint plant from its original location
Before we delve into the specifics, it’s important to note that nearly all varieties of mint should ideally be transplanted in the spring.
Now, to master the technique of removing the mint plant from its original location, follow these steps:
- Identify the mint plant you’re currently growing. The plant should be healthy and vigorous to withstand the transplant.
- Gently remove the mint from its original location. Be careful not to damage the roots. They’re vital for the plant’s survival after transplantation.
- If you’re transplanting the mint in a pot or another location, ensure the new home is ready to receive the plant.
Tips for placing your mint plant in the new pot
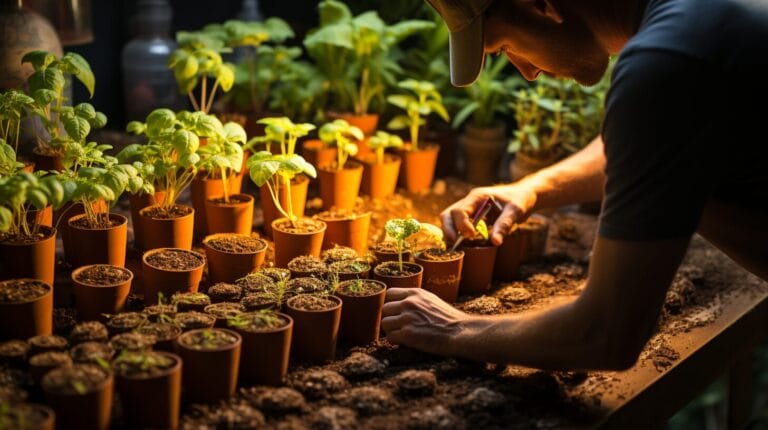
Once you’ve carefully extracted your mint plant, it’s time to place it in its new pot, and there are a few key steps to ensure this process is successful.
First, you’ve got to get a pot of soil ready. Don’t just dump your mint in; instead, carefully place your mint in the center of the pot. This position helps the roots spread evenly and gives the plant the best chance of thriving. Avoid placing it too near the edge of the pot, where it could easily dry out or become root-bound.
After you’ve positioned your mint, water the soil thoroughly but gently, avoiding harsh streams that could dislodge the plant.
The proper way to replenish soil around the plant
I’ll show you the five essential steps to properly replenish the soil around your newly transplanted mint plant. This is a crucial step to ensure your mint thrives, and it goes a long way in preventing transplant shock.
- First, I start by adding compost to the soil. This enriches it, providing the necessary nutrients for growing your own mint.
- Then, I dig a hole deep enough to plant the cutting.
- Lastly, I carefully backfill the soil around the mint plant, packing it gently to not damage the roots.
Transplanting mint is a delicate process, but with these steps, you’ll master the technique and replenish the soil around the plant effectively. Remember, your mint plant’s survival and growth depend on this.
Mint Plant Care After Transplanting

Now that we’ve tackled the transplanting process let’s shift our focus to the care of your mint plant post-transplant. It’s critical to understand the importance of watering, light, and temperature conditions for your mint’s growth. We’ll also discuss routine care and maintenance tips to keep your mint flourishing.
How and when to water the mint plant post-transplant
In my experience, understanding the correct timing and method for watering is critical to your mint plant’s health after the transplant.
Here’s what I’ve learned:
- How to water: Water your mint plant post-transplant thoroughly, ensuring the water reaches the root system. The soil should be moist, not soaking wet.
- When to water: Ideally, water in the early morning or late evening when temperatures are cooler. This prevents water from evaporating before it reaches the roots.
- Change the water: If you’re growing your mint in water, change it every few days to prevent root rot.
Optimal light and temperature conditions for mint growth
After transplanting, I’ve found that the optimal growth of a mint plant requires both an appropriate amount of light and a suitable temperature range.
For mint-in containers, it’s best to place them in a spot where they’ll receive plenty of indirect light. Too much direct sunlight can scorch the leaves, so it’s a delicate balance to strike.
As for temperature, mints thrive in cooler growing zones, typically between 60 and 70 degrees Fahrenheit. In hotter climates, a shaded area will serve the plant mint best. If you’re unsure of your area’s growing zone, your local garden center can provide guidance.
Understanding optimal light and temperature conditions for mint growth will ensure a hearty and healthy plant post-transplant.
Routine care and maintenance tips for your transplanted mint
I’ve got some handy tips for routine care and maintenance of your replanted mint, but remember, diligence and consistency are key. Mastery of growing herbs like mint comes with experience and patience.
Here are my top three tips:
- Choose a pot with good drainage. Mint requires well-drained soil to thrive. Overwatering can lead to root rot, detrimental to the plant’s health.
- Mint loves sunlight. Ensure the plant gets at least 4-6 hours of sunlight daily. If you’re growing it indoors, place it by a south or west-facing window.
- Regularly trim your mint foliage. This promotes bushier growth and helps prevent the plant from becoming leggy.
Troubleshooting Common Issues in Replanting Mint

Now, let’s tackle some common issues you might face when regrowing mint. I’ll show you how to handle problems like overwatering and poor drainage, which can affect your mint’s growth. We’ll also talk about how to deal with pests and diseases that could harm your plants.
Understanding common problems in growing mint in pots
I will explore some common issues you might encounter when growing mint in pots. Understanding common problems in growing pot mint is crucial for a strong plant.
- Overwatering: Mint in a container can easily become waterlogged, leading to root rot. The leaves from the bottom might turn yellow or brown, and the plant may wilt.
- Poor Drainage: If your pot doesn’t have good drainage, it could lead to similar problems as overwatering.
- Nutrient Deficiency: Mint needs a well-balanced soil. If your plant’s leaves are discolored, or growth is stunted, it might need more nutrients.
Keeping these issues in mind will help you replant mint successfully and maintain a healthy plant.
How to amend overwatering or poor drainage issues
When dealing with overwatering or poor drainage issues, it’s crucial to take immediate steps to solve these problems. I’ll guide you through the process. The first action is to remove the plant from its current location. Be gentle with your peppermint plant, as its roots may be delicate.
Next, assess the plant and soil. If they’re extremely saturated, allow them to dry out before you’re ready to plant again. Consider adding sand or organic matter to improve the soil’s drainage.
When the plant and soil are ready, choose a well-draining spot to plant in the garden. Regularly check the moisture levels after regrowing. This method should help you amend overwatering and poor drainage issues effectively.
Dealing with pests and diseases that affect mint plants
In regrowing mint, it’s crucial to watch for common pests and diseases, and I’ll show you how to handle these issues effectively.
Mint is a great herb to grow because of its many uses, but it’s not immune to problems. Many types of mint, including spearmint and peppermint, can be affected.
Here’s how I deal with pests and diseases that affect mint greens:
- Regular inspection: I check my plants often for signs of pests or disease.
- Natural pesticides: I prefer organic solutions to dealing with pests. A homemade garlic spray works wonders.
- Disease prevention: I keep my plants healthy by ensuring they have the right soil, water, and light conditions.
This way, you’ll be a pro at regrowing and maintaining mint in no time!
You can also try planting it with Petunias as it deters pests. Read more in Planting Herbs And Flowers Together In Pots.
Frequently Asked Questions
What Are the Health Benefits of Growing and Consuming Mint?
Growing and consuming mint boosts my digestion, soothes headaches, and improves oral health. It’s packed with antioxidants, offering skin benefits. Moreover, it’s a natural stimulant that can help combat fatigue and depression.
Can Mint Greens Be Toxic to Pets?
Mint greens or plants can be harmful to pets. While I love mint, it’s essential to know that it can cause gastrointestinal upset in dogs and cats. So, it’s best to keep it out of their reach.
How Long Does It Take for a Mint Green to Fully Mature After Replanting?
After replanting, it typically takes about a month and a half for a mint green to fully mature. However, it’s important to remember that this timeline can fluctuate based on care and environmental factors.
Can Mint Be Grown Indoors All Year Round?
Mint can be grown indoors all year round. I’ve found it thrives in well-drained soil and indirect sunlight. Regular pruning helps, too. It’s a great way to have fresh mint available anytime.
What Other Plants or Herbs Can Grow Well With Mint?
Other herbs that’ll thrive with mint include basil, cilantro, and parsley. These companions enjoy similar growing conditions. Remember, mint is invasive, so I’d recommend planting it in a separate pot to avoid overcrowding.
Conclusion
So, there you have it! Replanting mint isn’t as tricky as it seems. With the right cutting, the perfect pot and soil, and a little TLC, you’ll have a thriving mint plant in no time. Remember to keep an eye out for common issues and address them promptly.
Happy gardening!


